You can improve the work of the web server which hosts customer websites (Apache) by using nginx, a supplementary high-performance web server which is typically used as a reverse proxy server. This web server was specifically designed for delivering large amounts of static content (such as images, video, css, xml, and so on). As opposed to Apache, nginx is much more efficient when it comes to handling a large number of concurrent connections. Another advantage of this web server compared with Apache is that nginx has a significantly smaller memory footprint per client connection.
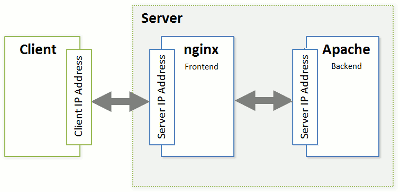
To leverage all the benefits of nginx, Plesk configures it as a reverse proxy server that stands between the Internet and Apache (see the diagram below). This means that nginx becomes a frontend web server that processes all incoming requests from site visitors. The requests are sent to Apache which, in turn, distinguishes requests for static and dynamic content. If a request is for a static file (such as jpg, css, html, and so on), Apache passes the request through all registered handlers (applies .htaccess directory-level configuration, rewrites a URL, and so on) and returns to nginx a response which contains only the location of the requested file on the file system. nginx locates the file and sends it to the client. If the request is for a dynamic file (such as a PHP script), Apache executes the file and sends the response to nginx, which delivers it to the client.
Such a combination of nginx and Apache gives the following advantages:
The technical details on how Plesk processes HTTP requests with the help of nginx are provided next in this section. For information on how to turn on the support for nginx in Plesk, refer to the section Installing nginx. If you do not want to use nginx, make Apache your frontend web server following the instructions in the section Turning off nginx. If you want nginx to process all HTTP requests for web content, see Adjusting Apache Web Server Settings.
To seamlessly integrate nginx with Apache, Plesk uses two additional Apache modules:
.htaccess related modules, mod_php, and so on). Therefore, if the request is for dynamic content, mod_aclr2 will never get it as the request will be served by upper-level handlers of certain Apache modules (mod_php, mod_perl, mod_cgi, and so on). The only exceptions are SSI requests: once they reach mod_aclr2, it redirects them to proper handlers. If the request is for a static file, mod_aclr2 searches for the exact file location on the file system and sends the location to nginx. Let us take a closer look at how Plesk processes requests for static and dynamic content with the help of these modules.
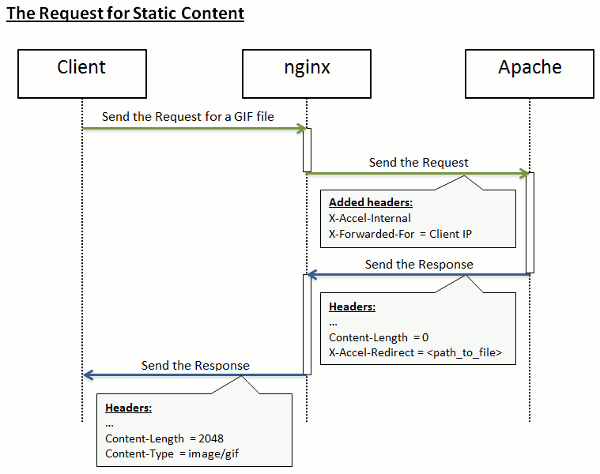
The sequence of processing an HTTP request for a static file is as follows (see the diagram):
.htaccess configuration, rewrites URL, and so on). In this step, mod_rpaf replaces the IP address of the nginx server in the REMOTE_ADDR Apache variable with the client's address from the X-Forwarded-For header.The diagram below is an example of how Plesk handles a request for a 2 KB GIF file.
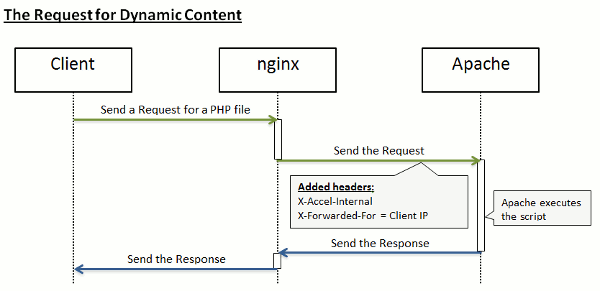
In the case of processing requests for dynamic content, the steps from 1 to 3 are the same. Then the request passes to the handler of the appropriate Apache module (mod_php, mod_perl, mod_cgi, and so on). The request never reaches mod_aclr2 (except for SSI requests). The handler generates a response and sends it to nginx, which, in turn, delivers the response to the client. The diagram below illustrates how Plesk processes a request for a PHP file.
If you perform a clean installation of Plesk, nginx will be turned on by default. If you upgrade from earlier versions, you can add the nginx component at any time after the upgrade in Tools & Settings > Updates & Upgrades > Add Components. Once the component is added, start the Reverse Proxy Server (nginx) service in Tools & Settings > Services Management.
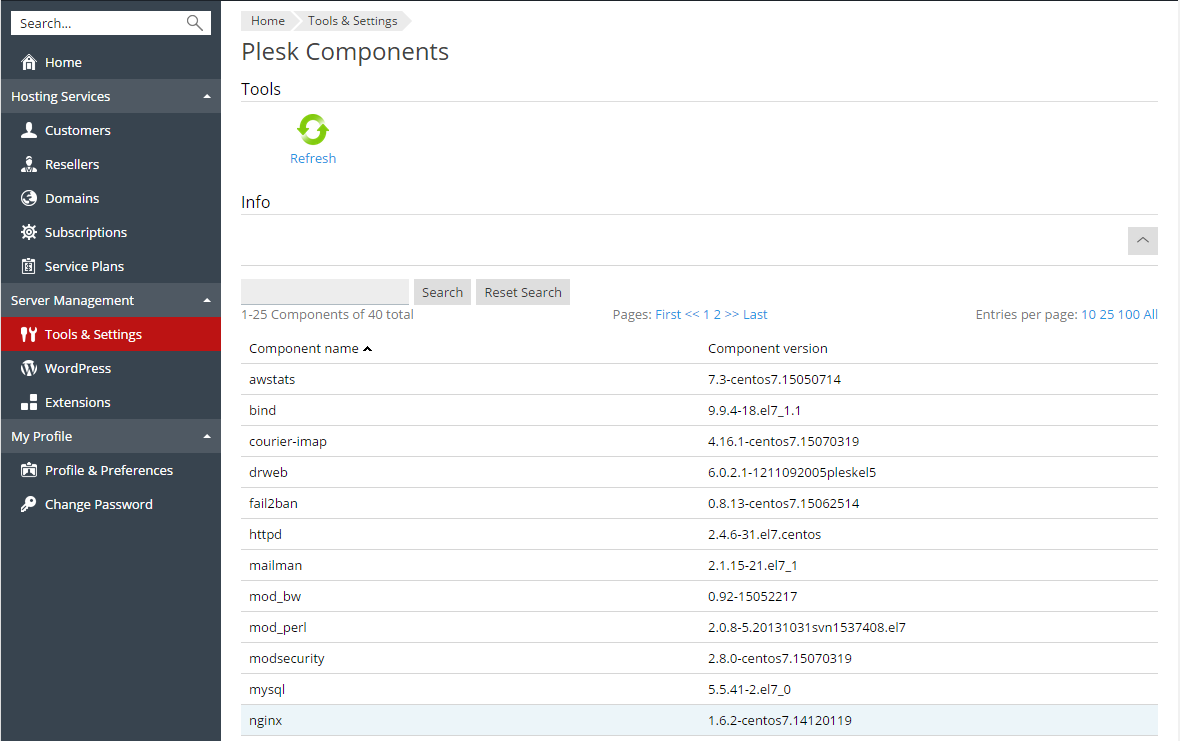
You can view the version of the installed nginx server in Tools & Settings > Server Components.
To return to the configuration with a single Apache web server, stop the Reverse Proxy Server (nginx) service in Tools & Settings > Services Management.
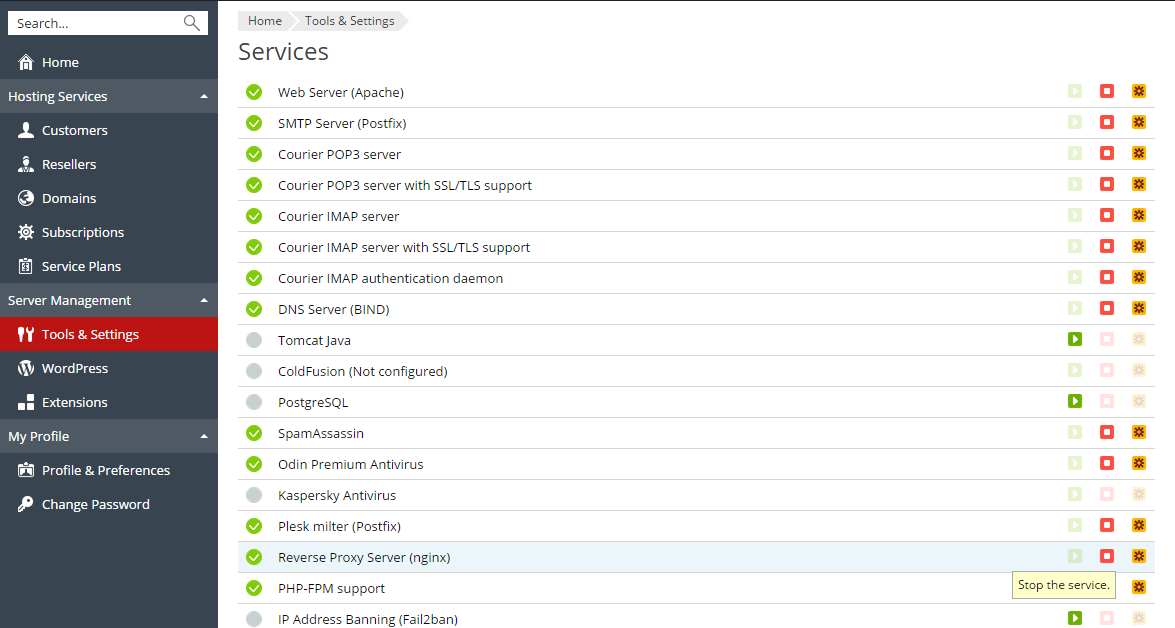
To make nginx the frontend web server again, start the Reverse Proxy Server (nginx) service.
Note: The start and stop operations for the Reverse Proxy Server (nginx) service do not only start and stop nginx, they actually switch the web server configuration (nginx and Apache combination or just Apache as a frontend web server). The restart operation works in the same way as for all other services: the nginx service is restarted.