WordPress Toolkit
WordPress Toolkit is a single management interface that enables you to easily install, configure, and manage WordPress. It is available if the WordPress Toolkit extension is installed in Plesk.
Note: WordPress Toolkit can install, configure, and manage WordPress version 3.7 or later.
Note: The WordPress Toolkit extension is free with the Web Pro and the Web Host Plesk editions and is available for a fee for the Web Admin edition.
Installing WordPress
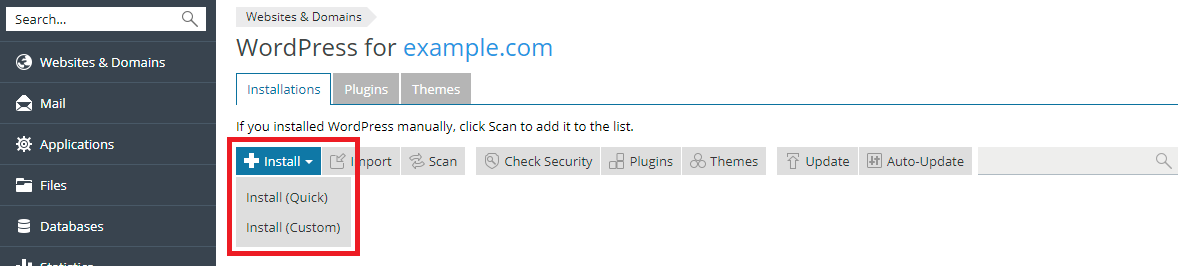
To install a new WordPress instance, go to WordPress and click Install. The following installation options are available:
- For an express installation, click Install (Quick). The latest version of WordPress will be installed, and the default settings will be used.
- If you want to change the default installation settings, click Install (Custom). This enables you to set up the administrator user, select the desired WordPress version, specify the database name, select auto-update settings, and more. You can also choose to add a single set of WordPress plugins and themes to your WordPress instance (if any sets are available). If you do, plugins and themes included in the set will be automatically installed together with WordPress. To see the list of plugins and themes included in a set, click View set contents.
Note: Installation of WordPress via the WordPress Toolkit is performed from the wordpress.org site.
The installation path of the installed WordPress site has the https prefix by default.
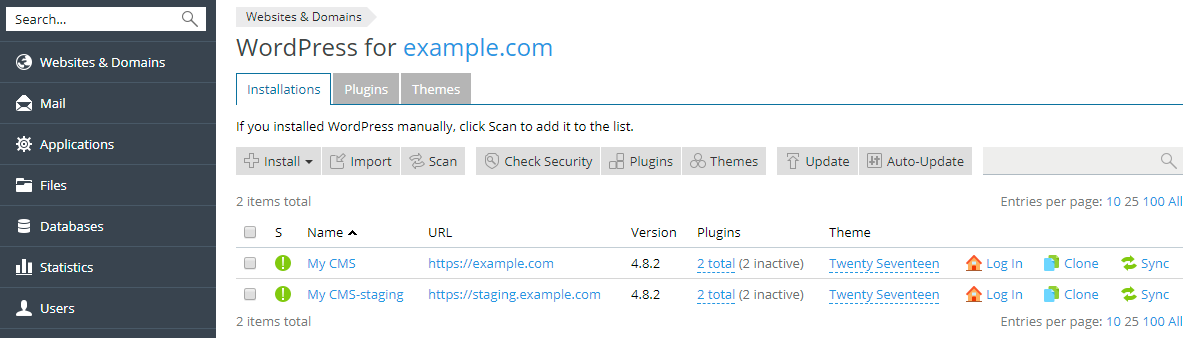
To view a list of all installations attached to the WordPress Toolkit, go to Websites & Domains > WordPress.
Adding existing WordPress Installations to WordPress Toolkit
All WordPress installations added using the WordPress Toolkit or through the Applications page appear in the WordPress Toolkit automatically; those installed manually need to be attached to the WordPress Toolkit. If you have upgraded from an earlier version of Plesk and you used WordPress, we recommend that you attach all existing WordPress installations to the WordPress Toolkit. To attach WordPress installations to the WordPress Toolkit, go to Websites & Domains > WordPress and click Scan. Note that if you install new copies of WordPress manually after the scan, these WordPress installations will not be attached to the WordPress Toolkit.
To detach a WordPress installation from the WordPress Toolkit, go to Websites & Domains > WordPress, click the WordPress installation name, and then click Detach. Note that a detached WordPress installation will be attached to the WordPress Toolkit again after you perform a new scan for WordPress installations.
You can completely remove any installation, no matter how it was installed: using the WordPress Toolkit, through the Applications page, or manually. To remove a WordPress installation from the WordPress Toolkit, go to Websites & Domains > WordPress, click the WordPress installation name, and then click Remove.
Importing WordPress Installations
You can use the "Web Site Migration" feature to migrate WordPress websites owned by you but hosted elsewhere to Plesk. When you migrate a WordPress website, Plesk copies all its files and the database to your server. Once a website has been migrated, you can manage it using WordPress Toolkit.
To migrate an existing WordPress website, go to Websites & Domains > WordPress, click Import, and then follow the instructions here.
Managing WordPress Instances
Go to WordPress to see all your WordPress instances.
WordPress Toolkit groups information about each instance in blocks we call cards.

A card shows a screenshot of your website and features a number of controls that give you easy access to frequently used tools. The screenshot changes in real time to reflect the changes you make to your website. For example, if you switch the maintenance mode on or change the WordPress theme, the screenshot of the website will change immediately.
Note: Changes you make directly in WordPress are synchronized with WordPress Toolkit once every 24 hours. To sync manually, click the  button.
When you move the mouse cursor over the screenshot of the website, the Open Site button appears. Click the button to open the website in a new browser tab.
Security
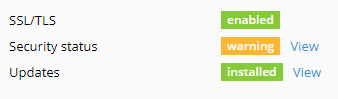
WordPress websites are frequently targeted by hackers. WordPress Toolkit analyzes how safe your instance is by checking the following security aspects and showing the result below the screenshot of the website:
If you see “warning” or “danger” next to one of these aspects, click “View” and fix it.
General Information
In the “General Info” section, you see the WordPress website’s title and its WordPress version. Here you can:
- Click “Change” next to the default “My SMS” title to give your website a custom name.
- Click “Log in” to log in to WordPress as an administrator.
- Click “Setup” next to “Log in” to change general WordPress settings.
Tools
In the “Tools” section, click to access the following WordPress Toolkit features:

- “Sync” to synchronize the content of your website with another one.
- “Clone” to make a full copy of your website.
- “Manage Files” to manage the website’s files in File Manager.
- “Back Up/Restore” to create a backup of your website and restore it if necessary.
The controls below give you easy access to the following settings and tools:
- “Search engine indexing” shows your website in search results of search engines.
- "Caching (nginx)" speeds up the website load time and reduces server load.
- “Debugging” helps you debug a website that is not ready for viewing and being tested or developed.
- “Maintenance mode” hides your website’s content from visitors.
- "Password Protection" specifies the password you will use to log in to WordPress from Plesk.
On the remaining three tabs you can manage the instance’s plugins, themes, and change the database username and password.
Managing Cards View
You can choose the way WordPress Toolkit shows cards. The default “Cards” view is best suited for a small number of instances. If you have a large number of instances, collapse cards  , or switch to the “Tiles” or “List” view.

You can also Sort and Filter instances to manage them more easily.
Removing and Detaching Instances
You can detach WordPress instances that you do not want to see and manage in WordPress Toolkit. Detaching does not remove the instance, merely hides it from WordPress Toolkit. A detached instance will be attached to WordPress Toolkit again after you scan for WordPress instances. To detach a WordPress instance, go to WordPress, choose the instance you want to detach, click the  button, and then click Detach.
Unlike detaching, removing completely deletes a WordPress instance. To remove a WordPress instance, go to WordPress, choose the instance you want to delete, click the  button, and then click Remove.
Search Engine Indexing and Debugging
By default, a newly created WordPress Toolkit website is shown in search results of search engines. If your website is not yet ready for public viewing, switch off Search engine indexing.
If you are installing WordPress for testing or development, you can enable Debugging to automatically find and fix errors in the website code. To do so, click "Setup" next to “Debugging”, select the WordPress debugging tools you want to activate, and then click OK.
Updating WordPress Instances
To keep your website secure, you need to regularly update the WordPress core, as well as any installed plugins and themes. You can do this either automatically or manually:
- Manual updates give you control over when updates are installed. For example, you can wait and see if installing a particular update caused issues for other WordPress users. However, you need to remember to update regularly to avoid falling behind.
- Automatic updates give you peace of mind by keeping your WordPress instance up-to-date. However, updates can sometimes break your instance, and with automatic updates, you may not learn about it right away.
For security reasons, we recommend that you configure automatic updates.
To update a WordPress instance manually:
- Go to WordPress. If your WordPress instance needs updating, you will see “available” next to “Updates” (below the website screenshot).

- Click “View” next to “Updates”, wait for WordPress Toolkit to load the list of available updates, and then select the updates you want to install.
Note: If an update of a WordPress core is available, you will see the “Restore Point” checkbox. Keep this checkbox selected to create a restore point you can use to roll back the update if something goes wrong.
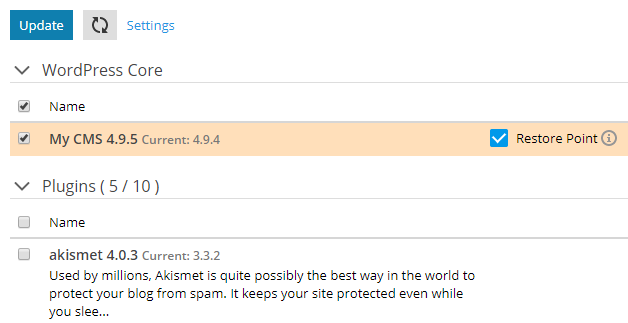
- Click Update.
The selected updates will be applied.
To configure automatic updates for a WordPress instance:
- Go to WordPress and choose the WordPress instance that you want to update automatically.
- Click “View” next to “Updates”, and then click “Settings”.
- Choose the desired automatic update settings. You can configure automatic updates separately for WordPress core, plugins, and themes (for example, you can choose to enable automatic updates for plugins and themes, but not for WordPress core). Follow these recommendations:
- Selecting “No” next to “Update WordPress automatically” turns off automatic updates of WordPress core. This is insecure.
- If your website is publicly available (production) and you are concerned that applying updates automatically may break it, select “Yes, but only minor (security) updates”.
- If your website is a non-public (staging) version of a WordPress website, select “Yes, all (minor and major) updates”. This will keep your staging website up-to-date and ensure that, should an update break something, it happens to the staging website and not to the production one.
- Click OK.
If you are concerned that WordPress automatic updates may break your website, use Smart Updates. With Smart Updates, WordPress instances are always updated safely without breaking your website.
Smart Updates
Smart Updates is a premium feature available in WordPress Toolkit 3.x and later. It helps you keep your production websites up-to-date without the risk of breaking your website. Smart Updates analyses the potential consequences of installing updates and advises you whether doing so is safe.
To keep your websites secure, you need to regularly update WordPress: themes, plugins, and core. However, these updates can potentially break you websites. Manual updates require your attention and cannot guarantee that your websites will continue working.
To ensure a WordPress instance is always updated safely without breaking your website, we developed the Smart Updates feature, which does the following:
- Clones the instance, and then analyses the clone and takes screenshots of the website’s pages (including dynamic content and carousels).
- Updates the clone, analyses it again, and then takes screenshots of the website’s pages again.
- Calculates how much the clone visually changed after the update and compares the result with a threshold predefined by you.
- With manual updates, Smart Updates shows you the “before” and “after” screenshots and the estimation whether it is safe to update or not. Here you can compare the screenshots, confirm whether you believe it is safe to update, and then decide whether to update the production website or not.
- With automatic updates, Smart Updates automatically updates the production website if the amount of changes does not exceed the threshold. Otherwise the update is not performed. In both cases, you receive an email with the results of analysis and the “before” and “after” screenshots. Same as with manual updates, you are encouraged to confirm whether you believe it is safe to update.
- Based on your responses, Smart Updates analyzes each update using artificial intelligence.
- This makes Smart Update better at predicting safe updates and minimizes the possibility of installing updates that can break your website.
Using Smart Updates
Smart Updates is a paid feature, which you buy on a per instance basis. You can use Smart Updates with both manual and automatic updates.
To enable Smart Update:
- Buy Smart Updates and install the received additional license key. You enable Smart Update separately for each instance.
- Go to WordPress and choose the instance for which you want to enable Smart Update. On the instance card, click “View” next to “Updates”.
- Toggle on Smart Update.
- Click Settings, select the "strict", "recommended", or "tolerant" policy, and then click OK. The chosen policy will determine how much the website can change after the installation of updates for Smart Updates to consider updating safe.
You have enabled Smart Update. Now you can use it with manual or automatic updates.
Note: Smart Update is not an alternative for backups. We recommend that you regularly backup your WordPress instances especially if you use automatic updates.
To use Smart Update manually:
- Make sure you have enough disk space for a full copy of the instance that you want to update.
- Select the update you want to install and click Update.
- Wait while Smart Update clones and analyses your website (this may take some time depending on the size of the website). The analysis is performed in the background, so closing the window will not interrupt the update.
- When the analysis is finished, you will see a message (like the one below) advising you if the update is considered safe according to the chosen policy.

- Click Compare to see the “before” and “after” screenshots of the different pages of your website. Compare the screenshots, and then click Yes or No next to “Is everything OK on the page”. This will make Smart Update better at predicting safe updates.
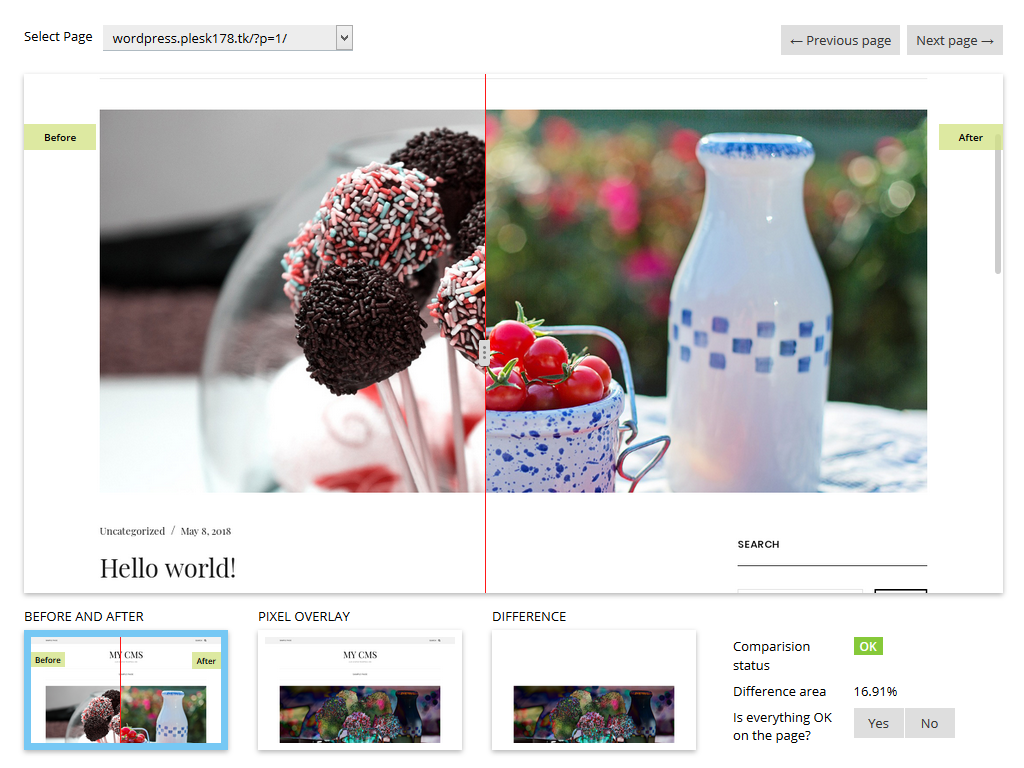
- If Smart Update indicates that it is safe to update and the screenshots appear to confirm it, click Apply Updates. Smart Update will update the production instance and delete the clone.
If you do not want to update the production instance, click Discard.
To use Smart Update automatically:
- Make sure you have enough disk space for a full copy of the instance that you want to update.
- When an update is available, Smart Update will clone the instance, update the clone and analyze the clone after update.
- If the result after update meets the chosen policy, Smart Update automatically updates the production instance. Otherwise, update is not applied. In both cases, you receive the email with the link. Follow the link to open a report with the comparison of “before” and “after” screenshots of your website in a new browser window. Compare the screenshots and then click Yes or No next to “Is everything OK on the page”. This will make Smart Updates better at telling apart and installing safe updates.
Managing Plugins
A WordPress plugin is a type of third-party software that adds new functionality to WordPress. With WordPress Toolkit, you can install and manage plugins on one or more WordPress instances.
Installing Plugins
In WordPress Toolkit, you can install plugins on one or all WordPress instances of the subscription. You can:
- Search for and install plugins found in the wordpress.org plugins repository.
- Upload custom plugins, which is useful if you cannot not find a suitable plugin in the wordpress.org repository or if you need to install your own plugin.
To install plugins on a particular instance:
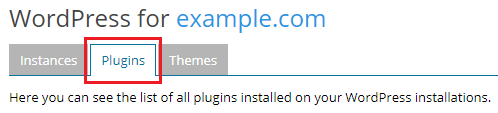
- Go to WordPress, go to the “Plugins” tab of an instance card, and then click Install.

- Search for plugins, and then click Install next to the plugin you want to install. Installed plugins are activated immediately.
To install plugins on all instances of the subscription:
- Select the desired subscription.
- Go to WordPress > the “Plugins” tab, and then click Install.
- Search for plugins, and then select the plugins you want to install.
Note: Selecting one or more plugins and then performing a new search without installing the selected plugins resets the selection.
- By default, newly installed plugins are activated immediately. You can prevent this by clearing the “Activate after installation” checkbox.
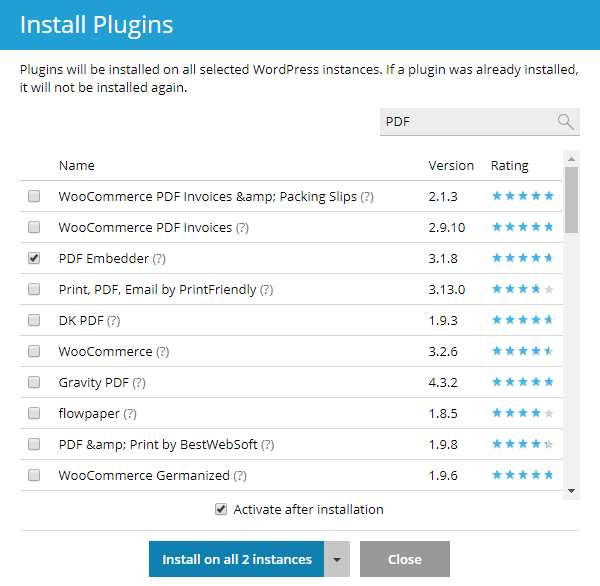
- Click Install on all ... instances.
To upload a plugin:
- Select the desired subscription.
- Go to WordPress > the “Plugins” tab, and then click Upload plugin.
- Click Choose File and browse to the location of the ZIP file containing the plugin you want to upload.
- Click Upload.
Removing Plugins
You can remove plugins from a particular instance or from all instances belonging to a subscription at once.
To remove plugins from a particular instance:
- Go to WordPress, and then go to the “Plugins” tab of an instance card.
- To remove one plugin, click the
 icon next to it. To remove several plugins, select them and click Remove.
 - Click Yes.
To remove plugins from all instances of the subscription:
- Select the desired subscription.
- Go to WordPress > the “Plugins” tab.
- Select the plugins you want to remove, click Uninstall, and then click Yes.
Activating and Deactivating Plugins
You can activate or deactivate plugins installed on a particular instance or on all instances belonging to a subscription at once.
To activate or deactivate plugins for a particular instance:
- Go to WordPress, and then go to the “Plugins” tab of an instance card.
- Switch on or switch off a plugin to activate or deactivate it, respectively.
To activate or deactivate plugins for all instances of the subscription:
- Select the desired subscription.
- Go to WordPress > the “Plugins” tab.
- Select the plugin you want to activate or deactivate.
- Click Activate or Deactivate.
Updating Plugins
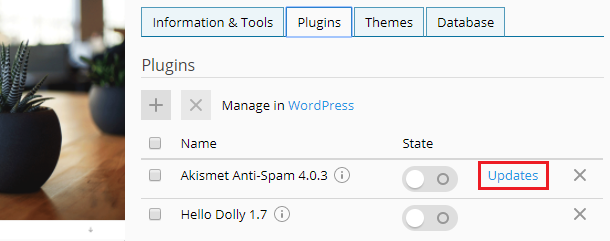
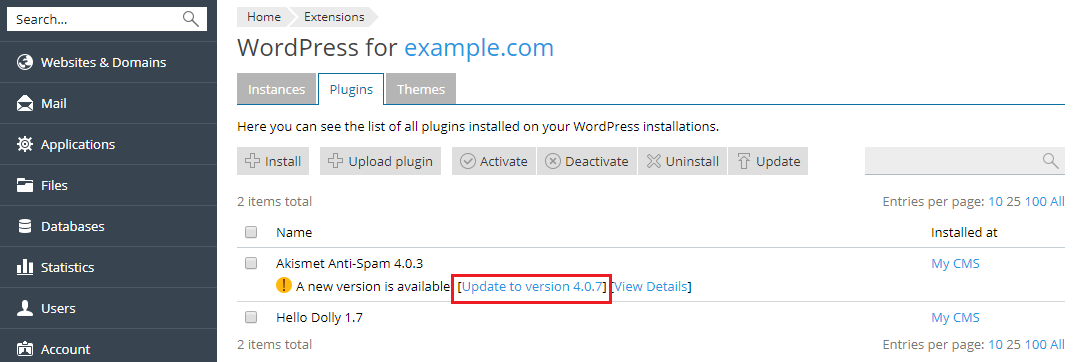
If a plugin needs updating, you will see “Updates” next to the plugin on the “Plugins” tab of an instance card.
You can do the following:
To update plugins on all instances of the subscription:
- Select the desired subscription.
- Go to WordPress > the “Plugins” tab.
- Click Update to version ... next to the plugin you want to update. To learn more about the update, click View Details. This will take you to the plugin's page on wordpress.org.
Note: Before updating the plugin, WordPress Toolkit prompts you to back up your subscription. If you are concerned that the update may break your website, create a backup or use Smart Updates.
- Click Yes.
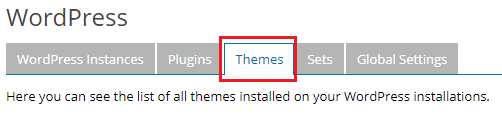
Managing Themes
A WordPress theme determines the overall design of your website including colors, fonts, and layout. By selecting a different theme, you change the look and feel of your website without changing the content. With WordPress Toolkit, you can install and manage themes.
Installing Themes
In WordPress Toolkit, you can install themes on one or all WordPress instances of the subscription. You can:
- Search for and install themes found in the wordpress.org themes repository.
- Install themes uploaded by the Plesk administrator.
- Upload custom themes, which is useful if you cannot find a suitable theme in the wordpress.org repository or if you need to install your own theme.
To install themes on a particular WordPress instance:
- Go to WordPress, go to the “Themes” tab of an instance card, and then click Install.

- Search for themes, and then ñlick Install next to the theme you want to install. By default, a newly installed theme is not activated.
To install themes on all WordPress instances of the subscription:
- Select the desired subscription.
- Go to WordPress > the “Themes” tab, and then click Install.
- Search for themes, and then select the themes you want to install.
Note: Selecting one or more themes and then performing a new search without installing the selected themes resets the selection.
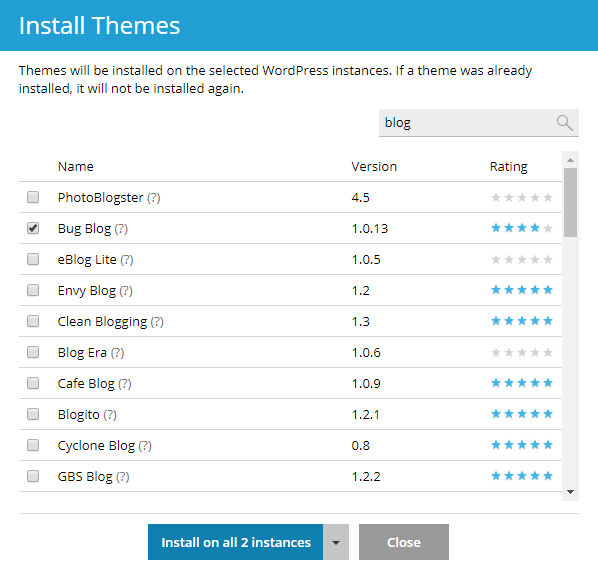
- Click Install on all ... instances.
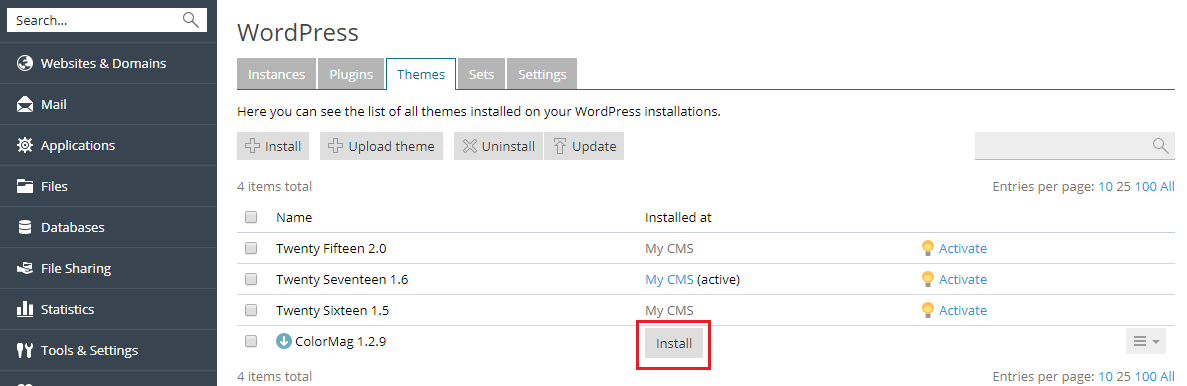
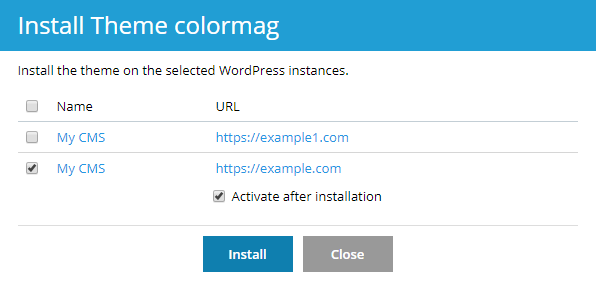
To install themes uploaded by the Plesk administrator:
- Go to WordPress > the “Themes” tab.
- Click Install next to a theme marked with the
 icon. If you see no such icons, it means that the Plesk administrator has not uploaded any themes.
 - Select the WordPress instances on which you want to install the theme.
- By default, a newly uploaded theme is not activated. You can activate it by selecting the “Activate after installation” checkbox.
- Click Install.
To upload a theme:
- Select the desired subscription.
- Go to WordPress > the “Themes” tab, and then click Upload theme.
- Click Choose File and browse to the location of the ZIP file containing the theme you want to upload.
- Click Upload.
To install an uploaded theme:
- Go to WordPress > the “Themes” tab.
- Click Install next to a theme you have uploaded.
- Select the WordPress instances on which you want to install the uploaded theme.
- By default, a newly uploaded theme is not activated. You can activate it by selecting the “Activate after installation” checkbox.
- Click Install.
Activating a Theme
You can activate a theme installed on a particular instance or on all instances hosted on the server. A WordPress instance can have only one active theme at a time.
To activate a theme for a particular instance:
- Go to WordPress, and then go to the “Themes” tab of an instance card.
- Switch on a theme to activate it. The theme that was previously active will be automatically deactivated.
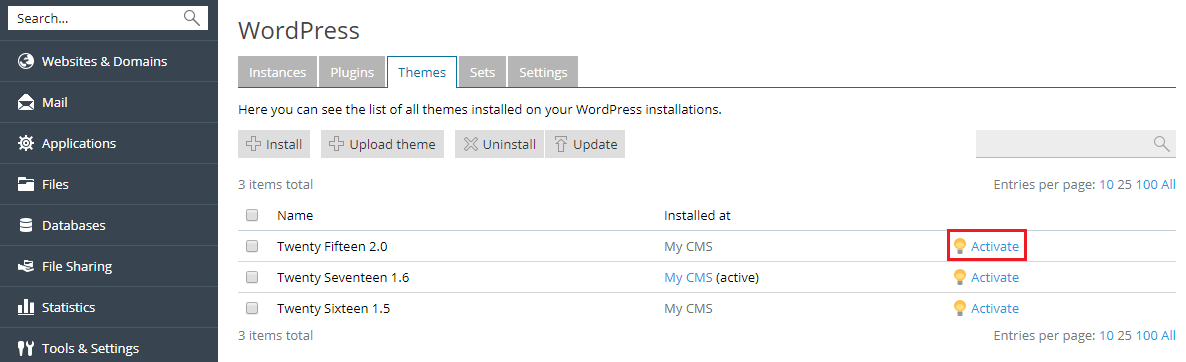
To activate a theme for all instances hosted on the server:
- Go to WordPress > the “Themes” tab.
- Click Activate next to a theme you want to activate.
Removing Themes
You can remove themes from a particular instance or from all instances belonging to a subscription. Note that you cannot remove an active theme. Before removing a currently active theme, activate another theme first.
To remove themes from a particular instance:
- Go to WordPress, and then go to the “Themes” tab of an instance card.
- Click the icon next to theme you want to remove. To remove several themes, select them and click Remove.
- Click Yes.
To remove themes from all instances of the subscription:
- Go to WordPress > the “Themes” tab.
- Select the themes you want to remove, click Uninstall, and then click Yes.
Updating Themes
If a theme needs updating, you will see “Updates” next to the theme on the “Themes” tab of an instance card. You can do the following:
- Update themes for one particular instance. Read how to do so in the “To update a WordPress instance manually” procedure.
- Update themes installed on multiple instances.
- Configure automatic updates for themes. Read how to do so in the “To configure automatic updates for a WordPress instance” procedure.
To update themes on multiple instances:
- Go to WordPress > the “Themes” tab.
- Click Update to version ... next to the theme you want to update. To learn more about the update, click View Details. This will take you to the theme's page on wordpress.org.
Note: Before updating the theme, WordPress Toolkit will prompt you to back up your subscription. If you are concerned that the update may break your website, create a backup or use Smart Updates.
- Click Yes.
Securing WordPress
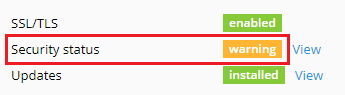
WordPress Toolkit can enhance the security of WordPress instances (for example, by turning off XML-RPC pingbacks, checking the security of the wp-content folder, and so on). You can see an instance’s security status on its card, below the screenshot of the website. If you see “warning” or “danger” next to “Security status”, we recommend that you secure your instance.
We call individual improvements you can make to an instance’s security “measures”. We consider certain measures to be critical. For that reason, WordPress Toolkit applies them automatically to all newly created instances.
Caution: Some security measures, once applied, can be rolled back. Some cannot. We recommend that you back up the corresponding subscription before securing a WordPress instance.
To secure a WordPress instance:
- Go to WordPress, choose the instance you want to secure, and then click “View” next to “Security status” on the instance card.
- Wait for WordPress Toolkit to display the security measures you can apply.
- Select the security measures you want to apply, and then click Secure.
All selected measures will be applied.
In rare cases, applying security measures can break your website. In this case, you can roll back the security measures you have applied.
To roll back applied security measures:
- Go to WordPress, choose the instance for which you want to revert an applied measure, and then click “View” next to “Security status” on the instance card.
- Wait for WordPress Toolkit to display the list of security measures.
- Click Revert next to the measure you want to roll back.
The applied security measures will be rolled back.
Cloning a WordPress Site
Cloning a WordPress site involves creation of a full website copy with all website files, the database, and settings.
You may want to clone your WordPress site in one of the following situations:
- You maintain a non-public (staging) version of a WordPress site on a separate domain or subdomain, and you want to publish it to a production domain to make it publicly available.
- You have a publicly available (production) WordPress site and you want to create a non-public (staging) copy of it, to which you can make changes without affecting the production site.
- You want to create a “master” copy of a WordPress site with preconfigured settings, plugins, and theme, and then clone it to start a new development project for a client.
- You want to create multiple copies of a WordPress site and make different changes to each one (for example, to show them to a client so that he or she can choose the one he or she likes best).
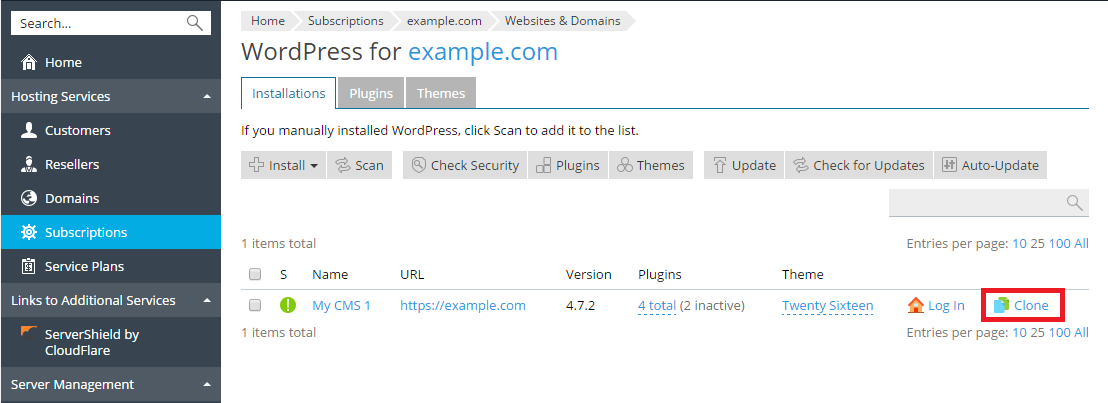
Clone a WordPress site:
- Go to Websites & Domains and click WordPress in the menu on the right.

- Click the Clone button next to the name of the WordPress installation you want to clone.
- Click new subdomain to select the destination where your WordPress site will be cloned.
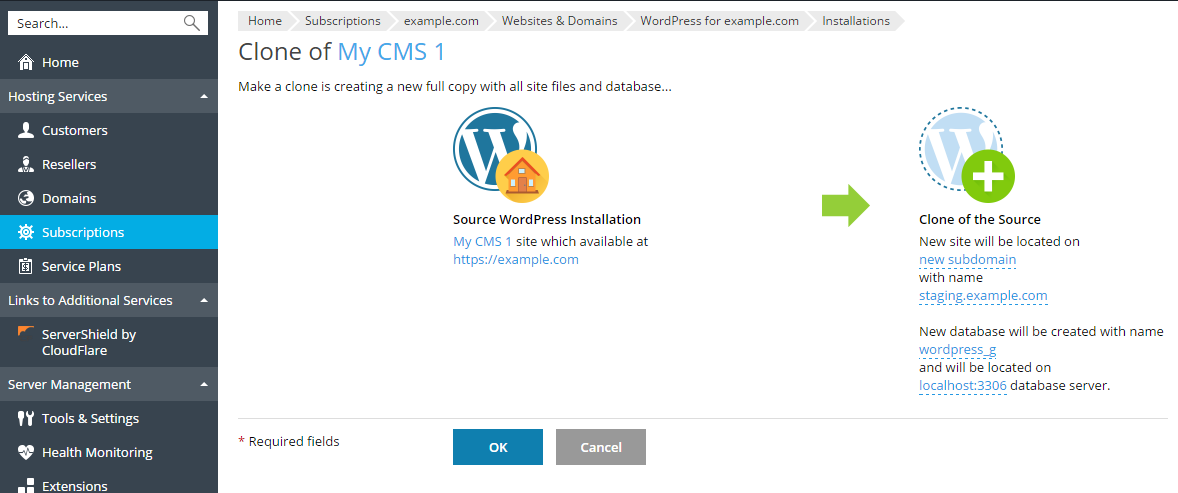
Select one of the available options:
- “New subdomain” - WordPress Toolkit suggests creating a new subdomain with the default staging prefix. You can use it or type in a desired subdomain prefix.
Note: You can change the default subdomain prefix. To do so, go to WordPress, go to the "Global Settings" tab, specify the desired prefix in the “Default subdomain prefix for cloning” text field, and then click OK.
- "Existing domain or subdomain" - use an existing domain or subdomain on the same or another subscription. Select the desired domain or subdomain from the list.
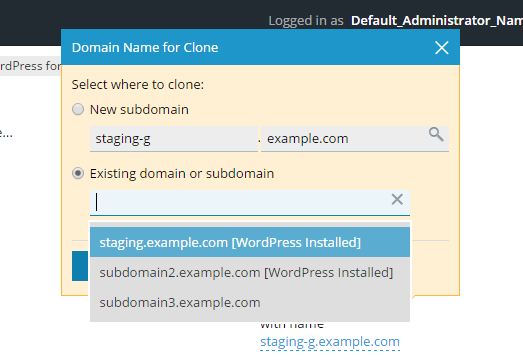
Note: Make sure that the domain or subdomain selected as the destination is not being used by an existing website. During cloning, website data existing on the destination may be overwritten and irrevocably lost.
- During cloning, a database will be created for the WordPress installation being created. Click the automatically generated database name (for example, wordpress_9) to change it. If multiple MySQL servers are registered in Plesk, you can select which one will host the database.
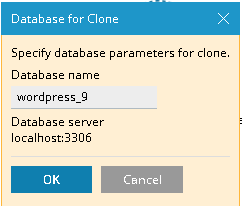
- When you are satisfied with the selected destination and the database name, click OK.
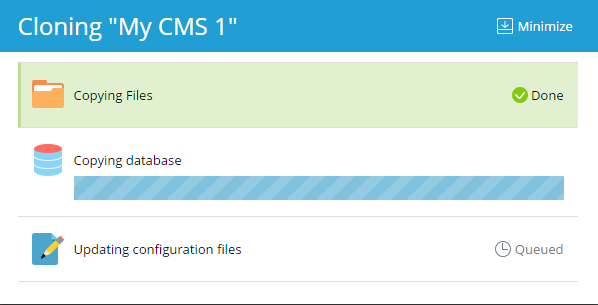
When the cloning is finished, the new clone will be displayed in the list of WordPress installations.
Synchronization of WordPress Sites
You can synchronize the content of your WordPress site including files and database with another WordPress site.
Let us say you maintain a non-public (staging) version of a WordPress site on a separate domain or subdomain and a publicly available (production) version of this site on a production domain. You may want to synchronize your WordPress sites in the following situations:
- You want to copy the changes you have made to the staging version to the production version.
- You want to copy the data from the production site to the staging site to see how the changes (for example, a new plugin) work with the production data. After checking that everything works fine, you may copy your changes to your production site.
- You have made some changes (for example, installed a new plugin) to the staging site, and these changes resulted in new tables being added to the database. You want to copy only these tables to the production site without affecting other data.
- You have upgraded the staging site to a newly released version of WordPress and fixed the post-upgrade issues (if any). You now want to push these changes to the production site.
- You can choose to synchronize the WordPress files, the WordPress database, or both the files and the database. When synchronizing the database, you can choose to synchronize all tables, or tables that are present on the source server but absent from the destination server, or you can specify individual database tables to be synchronized.
When performing the sync, keep in mind the following:
- The selected data are copied from the source site to the destination site. Any files and/or database tables present both on the source and the destination that are not identical are copied from the source to the destination. Files and database tables present only on the destination are not affected.
- During synchronization, the destination site enters maintenance mode and becomes temporarily unavailable.
- If the WordPress version on the destination site is earlier than on the source site, WordPress Toolkit first upgrades WordPress on the destination site to match the version installed on the source site, and then runs the synchronization.
- If the WordPress version on the source site is earlier than on the destination site, synchronization is aborted. To synchronize data, you need to upgrade WordPress on the source to the version installed on the destination, or a later version.
- If the database prefix on the source and the destination differs, WordPress Toolkit will change the database prefix on the destination site to match that on the source during sync.
- Synchronization of data between a regular WordPress instance and a multisite one is not supported. We recommend using cloning instead.
Caution: During synchronization, files and database tables copied from the source overwrite those present on the destination. Any changes made to the files and database tables on the destination prior to synchronization will be discarded and lost without warning.
Note: If you have caching plugins installed on a WordPress website you want to synchronize with, clear the cache on the source website before sync. Otherwise, the destination website might work incorrectly.
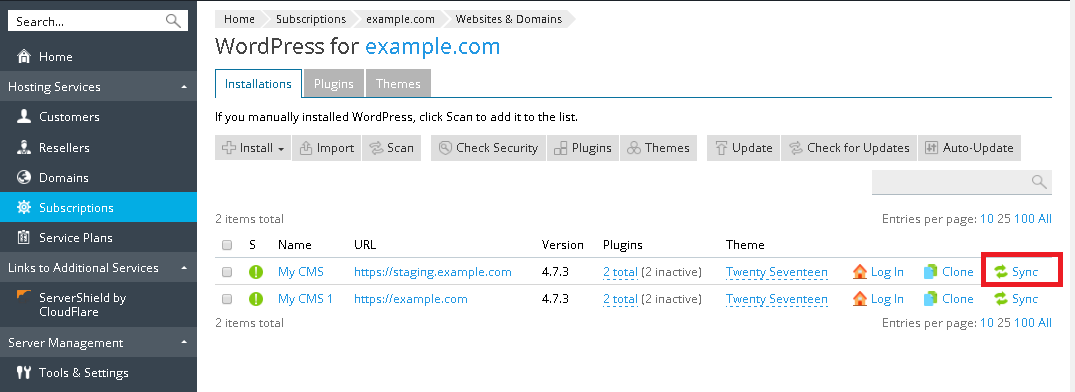
To synchronize a WordPress site data with another site:
- Go to Websites & Domains and click WordPress in the menu on the right.
- Click the Sync button next to the name of the WordPress installation you want to synchronize.
- Under Destination WordPress Installation, select the destination WordPress installation you want to synchronize the data with. This WordPress installation may be related to the same or another subscription.
- Under Select Content to be Copied, select which data you want to synchronize with the destination WordPress site. The following options are available:
- When you are satisfied with the selected destination and the content to be synchronized, click OK.
When the synchronization is finished, you will see a page displaying the settings of the source WordPress installation. On it, you can see the last time synchronization was performed.
Database synchronization
When you choose to synchronize databases (that is, you have selected either the Database Only or the Files and Database option), you need to specify which database tables you want to synchronize:
- All Tables (the default option)
- New tables
- Selected tables. If you select this option, you can see the list of available database tables and select which ones you want to synchronize. If you want to synchronize all changes except for pages, posts, and users, you can select all database tables except the tables with the
_postmeta, _posts, _username, and _users suffixes, by clicking the corresponding link.
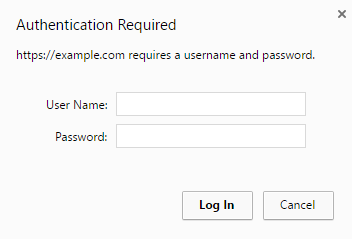
Protecting a Website with a Password
You can set a password to protect access to your WordPress website. Anyone visiting a password-protected website must enter the valid username and password to view the website content.
Password protection is useful in the following cases:
- The website is under development and you do not want anyone else to see it.
- You want to show a demo version of the website only to certain visitors.
To protect a WordPress website with a password:
- Go to WordPress, choose the instance you want to protect with a password, and then switch on “Password protection”.
- Create or generate a password. If desired, you can also change the username (the instance's administrator username is used by default).
- Click Protect.
To disable “Password protection”, switch it off.
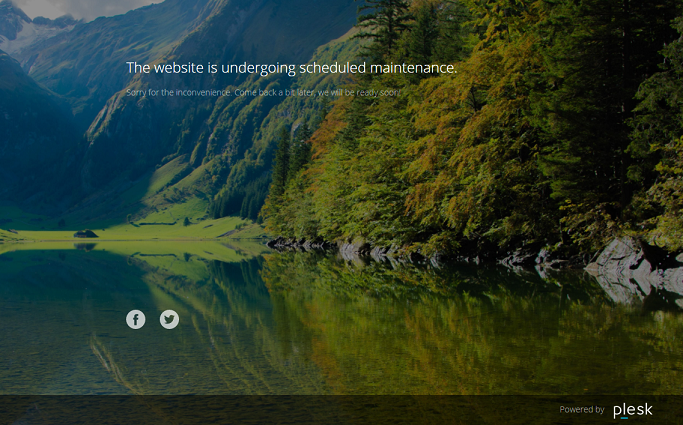
Maintenance Mode
When a WordPress website enters maintenance mode, the website's content is hidden from visitors without being changed or otherwise affected. Visitors accessing your website when it is in maintenance mode see a maintenance screen webpage instead of the website content.
Switching on the maintenance mode
Your WordPress website enters maintenance mode automatically when you are:
- Upgrading your WordPress instance.
- Synchronizing WordPress instances via WordPress Toolkit.
If you are making changes to your website and want to temporarily hide it from visitors, you can manually put it into maintenance mode.
To put a WordPress website into maintenance mode:
- Go to WordPress and choose the WordPress instance you want to put into maintenance mode.
- Switch on “Maintenance mode” on the instance card.
To take your website out of maintenance mode, switch off “Maintenance mode”.
Customizing the maintenance page
Plesk WordPress Toolkit allows you to change certain attributes of the maintenance page to make it more informative. For example you can:
- Change the text displayed on the maintenance page.
- Add a countdown timer.
- Provide or remove links to social network pages.
To customize the maintenance page:
- Go to WordPress, choose the WordPress instance whose maintenance page you want to customize, and then click “Setup” next to “Maintenance mode” on the instance card.
- In the Screen Text section, you can change the text displayed. Use HTML tags to format the text's appearance.
- In the Timer section, you can set up and switch on the countdown timer that will be displayed on the maintenance page.
Note: The timer is only meant to inform visitors about the estimated duration of the remaining downtime. Your website is not taken out of maintenance when the countdown is finished; you must do that manually.
- In the Social Network Links section, provide or remove links to social network pages (Facebook, Twitter, and Instagram).
- Click OK.
If you have coding skills, you can customize the maintenance page beyond the options described above.
To customize the maintenance page for a particular website:
- Go to WordPress, choose the WordPress instance whose maintenance page you want to customize, and then click “Setup” next to “Maintenance mode” on the instance card.
- Click Customize and edit the maintenance page template in Code Editor.
- Click OK.
Restoring the Default Maintenance Page
If necessary, you can restore the default maintenance page.
To restore the default maintenance page:
- Go to WordPress and choose the WordPress instance whose maintenance page you want to reset to default.
- Click “Setup” next to “Maintenance mode” on the instance card and then click Restore Default.