Backing Up Individual Accounts and Sites
To back up a user account with or without sites:
Click Customers.
Locate and click the customer whose account you want to back up.
In the list of customer’s domains (the Domains tab) or subscriptions (the Subscriptions tab), click the icon in the very right column and select Manage in Customer Panel to open hosting operations.
Click Account and do one of the following:
Note
Depending on the customer’s permissions, one of these options might be unavailable.
- To back up a user account with sites, click Back Up My Account and Websites.
- To back up only websites with content, click Back Up Websites. Alternatively, use Websites & Domains > Backup Manager.
Click Back Up.
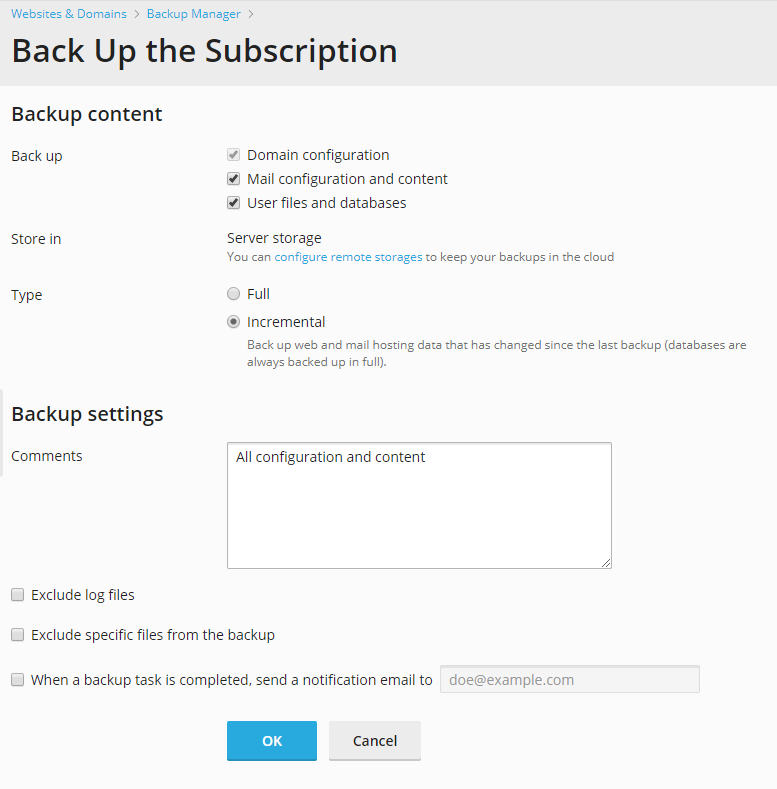
Specify the following:
What data to back up. You can back up only the settings, or the settings and all data. To learn what is included in backups, refer to the Backing Up and Restoration section.
Location where to store the backup file. Select the storage where you would like to store the backup file.
Type.
To backup all the data, select Full.
A full backup can include either configuration or configuration and content, depending on what you selected in Back up.
To back up only the changes made since the time of the previous backup, select Incremental.
Incremental backups always include configuration with content, including databases. Database-related content is included in full, while web and mail related content is backed up incrementally.
If no backups have been created yet, the first backup will be a full backup. For more details, refer to Incremental Backup.
Splitting of the backup file. To create a multivolume backup, select the respective checkbox and specify volume size in megabytes. Multiple volumes are supported for backups stored in personal FTP storage.
Comments about this backup.
Exclude log files. Select this option if you want all log files (including the logs from the system directory) to be excluded from backup.
Exclude certain files from the backup. Select this option if you do not want to include some files or directories into backup. For example, you may want to exclude log files or temporary file directories from backup. If you have no access to some files, you can also exclude these files from backup in order to avoid errors. Specify the files or directories according to the following rules:
Separate files by the new line or the “,” symbol.
The “*” mask can be used to replace any symbol except “/” in the file or directory name. For example: /some/*/logs – means the logs directory in some subdirectory of the some directory, /some/log* - means the files and the directories starting with log in the some directory, */logs – means the logs directory in some subdirectory of a subscription root directory.
The “**” mask can be used to replace multiple repeated symbols or directories. For example: **/logs - means the logs directory in a sequence of several subdirectories in a subscription root directory.
Directory paths should not be equal to “.” or “..” and should not contain special symbols like “t”, “n” and so on.
Note
The Exclude log files and the Exclude certain files from the backup options are available only if you have selected the User files and databases option.
Email notification on backup completion. If you want to be notified of the backup completion, click When a backup task is completed, send a notification email to and type your email address.
Suspend domains until backup task is completed. Select this option to prohibit users from making changes to content or settings of websites while they are being backed up.
Click Back Up. The backup process starts.
When backing up is finished, the backup file will be saved to the storage you selected.