Access from Gmail on Android
You can set up Gmail on Android automatically (which is enabled by the mail autodiscover feature) or manually. The following instructions were verified against Android 6.0.1.
To set up Gmail on Android automatically:
Open Gmail.
In the top right corner, tap your profile picture and tap Add another account.
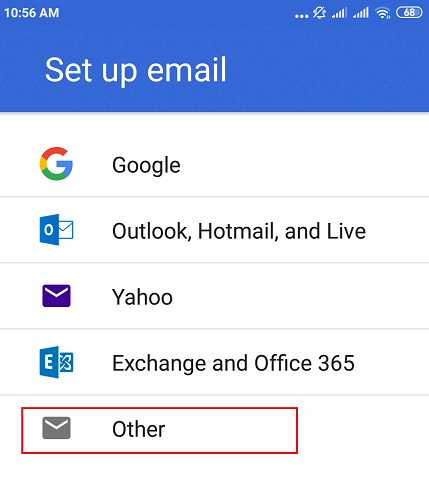
Choose “Other”.
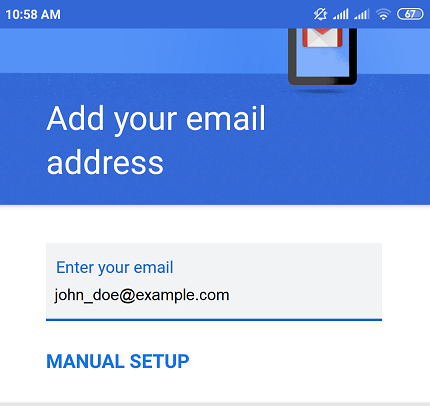
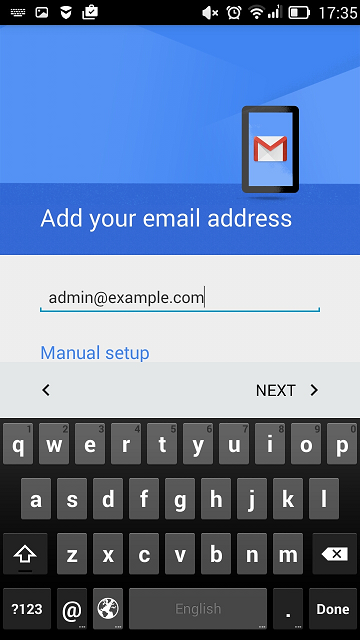
Enter your email address and tap Next.
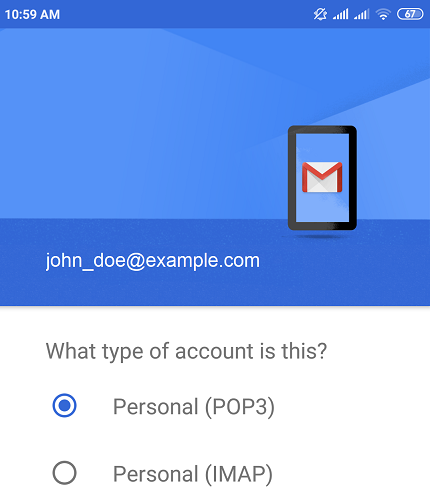
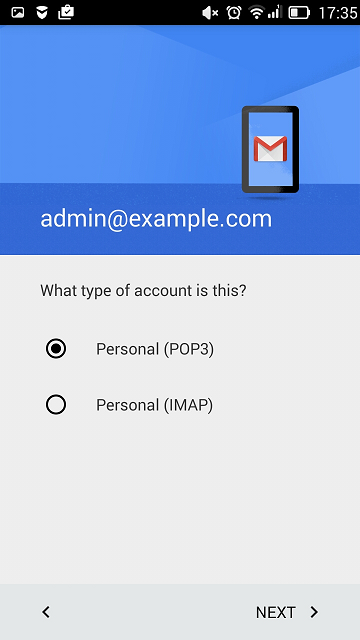
Choose the account type and tap Next. To keep the copies of email messages on the server, select the IMAP option. If you do not want to keep them on the server, select POP3.
Specify your email account password and tap Next.
The application will automatically fetch the incoming server settings. Select whether deleting emails from Inbox will also delete them from your Plesk server or not and tap Next.
Note
You may see the “Certificate not valid” warning if the mail server or domain is not secured with a valid SSL/TLS certificate. To proceed via HTTP, tap Advanced and then tap PROCEED ANYWAY.
The application will automatically fetch the outgoing server settings. Tap Next.
Note
Here you may see the “Certificate not valid” warning again. To proceed via HTTP, tap Advanced and then tap PROCEED ANYWAY.
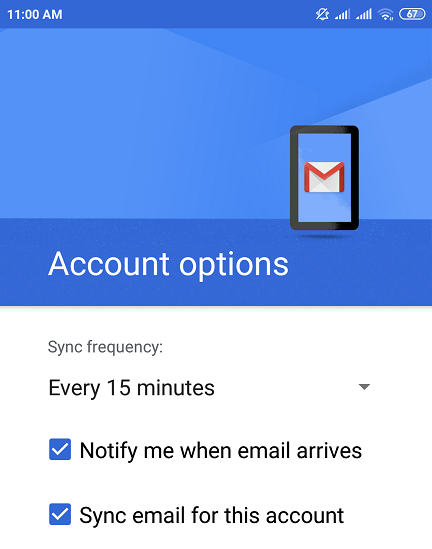
Keep the default Gmail sync settings or change them and tap Next.
(Optional) Change the account name and/or specify the name that will be displayed on sent messages.
Tap Next to exit the setup.
The setup is done. You can see the new account in the list of accounts in Gmail.
To set up a Gmail on Android manually:
Open Gmail.
In the top right corner, tap your profile picture and tap Add another account.
Choose “Other”.
Enter your email address and tap Manual Setup.
Choose the account type and tap Next. To keep the copies of email messages on the server, select the IMAP option. If you do not want to keep them on the server, select POP3.
Specify your email account password and tap Next.

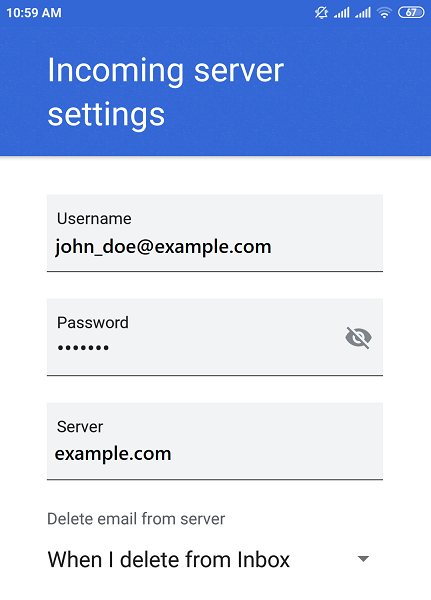
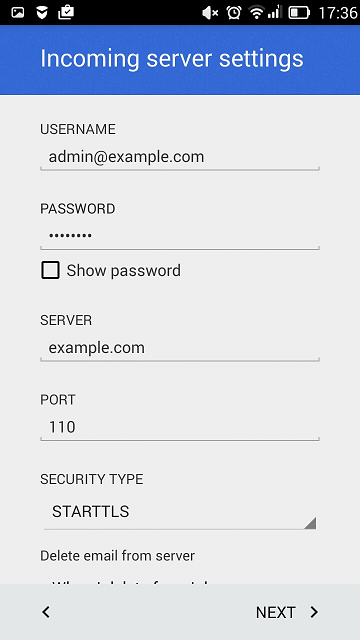
The next screen displays the incoming server settings. Specify the port number 110 for POP3 or 143 for IMAP and tap Next.
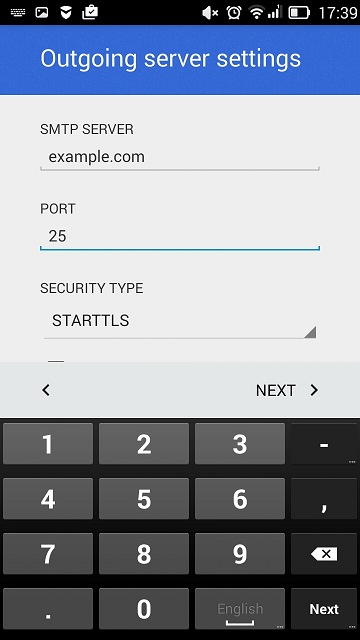
The next screen displays the outgoing server settings. Specify the port number 25 and tap Next.
When all the data is specified, your Android device will check the connection to the server and create your mail account. The new account will be displayed in the list of accounts in the Gmail application.