Managing Subscriptions
After you have subscribed a customer to a service plan, you can perform operations with their subscription.
It is easy to find the required subscription by using the Domains page in Server Administration Panel. The page provides facilities to find a domain, a subdomain, a domain alias, a customer account, or a company by name. On this page, you can find relations between domain names and subscriptions and also view the following information:
- The hosting type associated with a domain name.
- The indication if a domain name is an alias.
To instantly view the content of each website from the liston the Domains page, click View Site.
Another way to proceed to a customer’s subscription is the Customers page > click the name of the customer > go to Domains tab or the Subscription tab. To learn more about the improved navigation among customers, resellers, and their domains and subscriptions, see Quick Navigation Among Plesk Objects.
Note that the administrator can manage both their own subscriptions, subscriptions belonging to their customers, as well as subscriptions belonging to customers of resellers. See the Helping Resellers Manage Their Subscriptions section for more information.
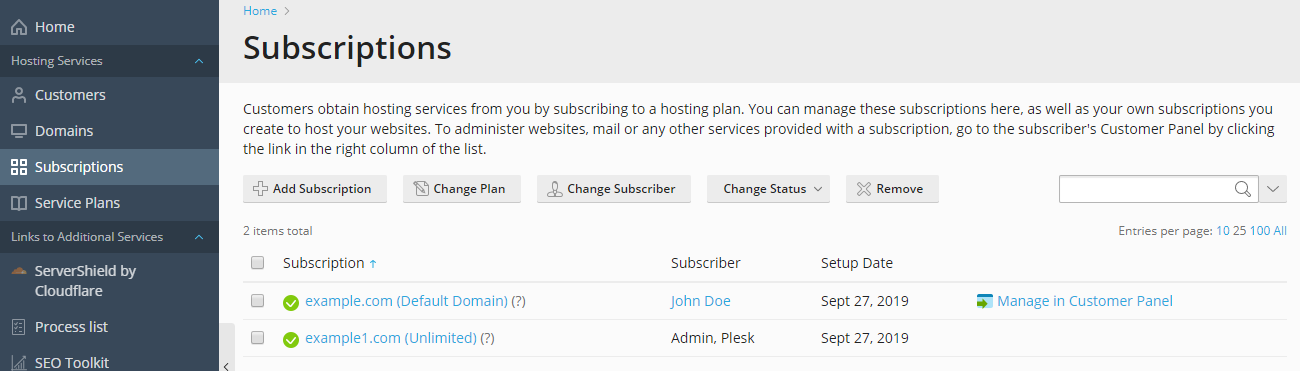
The following operations on subscriptions are available in Subscriptions.
Changing Subscription’s Hosting Settings
Hosting settings of a subscription include: the IP address on which the subscription’s websites are hosted, database servers that the websites use by default, and credentials of a system user account linked with the subscription (used to manage files and folders of websites within the subscription, and to access the server via SSH or Remote Desktop).
To change a subscription’s hosting settings:
- Go to Subscriptions, and click the <Subscription> in the list.
- Click Customize in the right sidebar.
- Update the information and click OK.
Adding Descriptions
You can add some notes, or a description, to a subscription. This description will be displayed in the list of subscriptions under the subscription’s name.
In addition to their own descriptions, administrators can view and edit descriptions that were added by resellers and customers. Resellers can view and edit descriptions that were added by their customers.
When creating a subscription, you can add your description in the Description box.
To manage descriptions of existing subscriptions:
- Go to Subscriptions, and click the <Subscription> in the list.
- Click [add description] (or [edit] if there is a description added in the past) under Hosting (Administrator’s description). Modify the text of your description and click OK.
- To remove the existing description, click [remove] and click Yes to confirm.
Transferring Subscriptions to Another User
This means that you change an owner of a subscription, or, in other words, reassign a subscription to another user - another customer, reseller, or yourself. In this case, the subscriptions are automatically unbound from their plans and become custom.
Note
Customers can restrict additional users to accessing only a specified subscription within their hosting account. For this purpose, user roles have the corresponding permission. When you transfer the subscription that has such an attached user role, the role with all its users is also transferred to the new subscriber.
To transfer one or more subscriptions to another user:
- Go to Subscriptions, and select checkboxes near the subscriptions that you are going to reassign.
- Click Change Subscriber.
- Select a new subscriber and click Next >>.
- Review the information about the changes to be made to the subscription settings and click OK.
Alternatively, to transfer a single subscription, click the corresponding subscription name in Subscriptions and click Change subscriber in the right sidebar under Account.
Suspending Subscriptions
Plesk suspends subscriptions automatically when their expiration date passes. In addition, you can suspend a subscription manually. This may be useful, for example, in case a website hosted within the subscription gets attacked.
The behavior of websites in suspended subscriptions is defined by one of the statuses (active, suspended, disabled) that you select in service plan or subscription settings (Hosting Parameters > Status of websites in suspended subscriptions). Websites, FTP, and mail services of suspended subscriptions are no longer available to the Internet users, unless the Active status for websites was selected. For more information about websites in suspended subscriptions, see Hosting Parameters of service plans and subscriptions.
To suspend a subscription:
- Go to Subscriptions and click the <Subscription> in the list.
- Click Suspend in the right sidebar under Hosting.
To suspend one or more subscriptions at once:
Go to Subscriptions.
(Optional) Filter out active subscriptions:
Click the
 button next to the search field above
the list.
button next to the search field above
the list.This will open the list filter.
Under the Status filter, select Active.
Select target subscriptions in the list.
Click Change Status > Suspend.
Activating Manually Suspended Subscriptions
Once a subscription is activated, all the services provided with it start working.
Note
Activating a subscription manually is good only for the subscriptions that were suspended manually. If you activate in such a way an expired subscription, it will be automatically suspended the next day. In such cases, renew the subscription as described further in this section.
To activate a subscription:
- Go to Subscriptions and click the suspended subscription in the list.
- Click Activate in the right sidebar under Hosting.
To activate one or more subscriptions at once:
Go to Subscriptions.
(Optional) Filter out suspended subscriptions:
Click the
 button next to the search field above
the list.
button next to the search field above
the list.This will open the list filter.
Under the Status filter, select Suspended.
Select the subscriptions in the list.
Click Change Status > Activate.
Renewing Expired Subscriptions
Plesk does not renew subscriptions automatically, so it suspends a subscription when the subscription expiration date comes.
To renew an expired subscription:
Go to Subscriptions, and click the <Subscription> in the list.
Click Activate.
Click Customize under Account in the right sidebar.
On the Resources tab, set up a new expiration date, or select Unlimited.
Click Update & Lock.
Note
After this step, the system will not apply further changes of the plan settings to this subscription. If you try to sync this subscription with the plan, the subscription will expire again unless you set the Unlimited validity period for this plan.
Removing Subscriptions
To remove subscriptions:
- Go to Subscriptions and select the subscriptions that you want to remove.
- Click Remove.
- Click Yes in the confirmation box.
Note
If a subscription is removed, all backups created at the level of this subscription are deleted from the internal Plesk storage.