Configuring DNS via Domain Connect
Configuring DNS settings manually can be a difficult task. Instead, you can use the Domain Connect extension, which helps you configure DNS automatically via Domain Connect, an open standard.
Domain Connect helps you configure DNS if you want to:
Put a website online when DNS hosting is configured externally.
You have a domain name, web hosting in Plesk, and DNS hosting at another DNS hosting provider. Now you need to put your website online by pointing the domain name to your Plesk server.
Add third-party services to your website.
Your website is running and DNS hosting is configured in Plesk. Now you want to add additional third-party services (for example, mail or an e-commerce platform) to your website. To bind the service to your website, the service provider needs to configure DNS records in Plesk.
Putting a Website Online via Domain Connect
The procedure may vary depending on your DNS hosting provider. Below, we will take GoDaddy and 1&1 as examples.
To put a website online via Domain Connect:
Once you have created a new domain in Plesk, click the “Connect the domain to Plesk” message.
Note
Even if you have closed the message, you can always find it in the domain’s DNS settings.
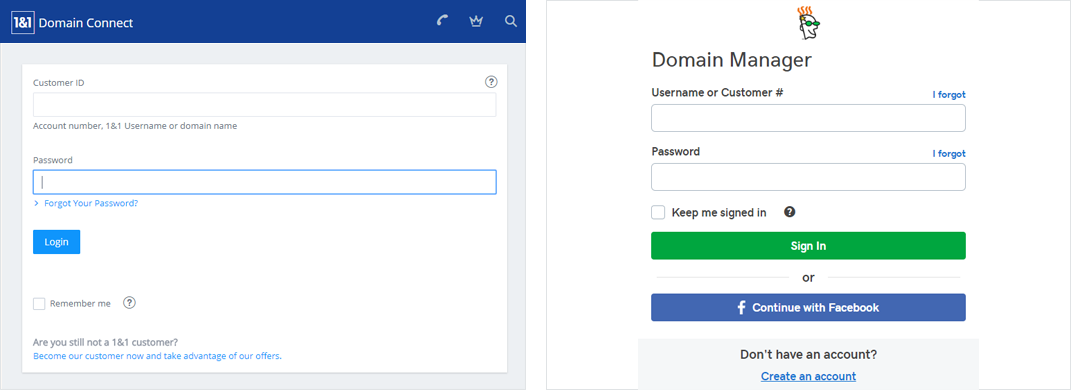
Enter the credentials of your DNS hosting provider account, log in, and then click Connect.
There is usually an option to see the changes Domain Connect will make to the DNS configuration. Click Connect to proceed.

Click Close.
Domain Connect has pointed the domain name to your Plesk server. Once the DNS changes propagate on the Internet, your website will be online.
Adding additional third-party services
The procedure may vary depending on the third-party service you want to add. Below, we will take Office 365 as an example.
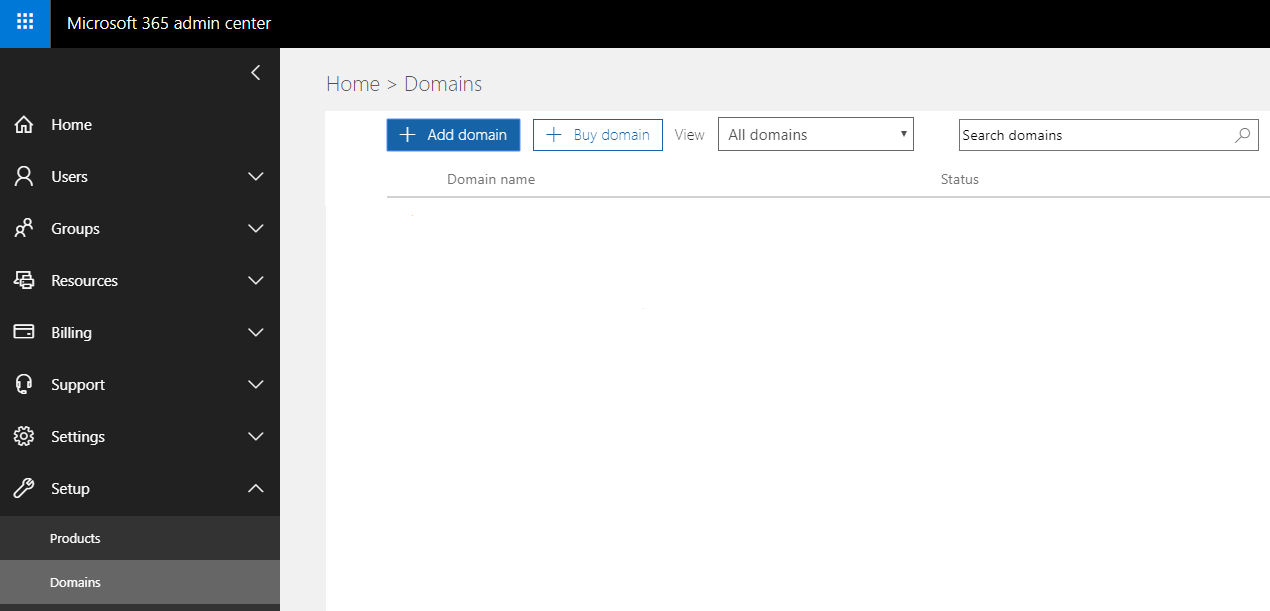
Log in to the Office 365 account.
Go to Admin > Setup > Domains, and then click Add domain.
Enter the name of the domain you want to connect Office 365 services to (the domain must be created in Plesk), and then click Next.
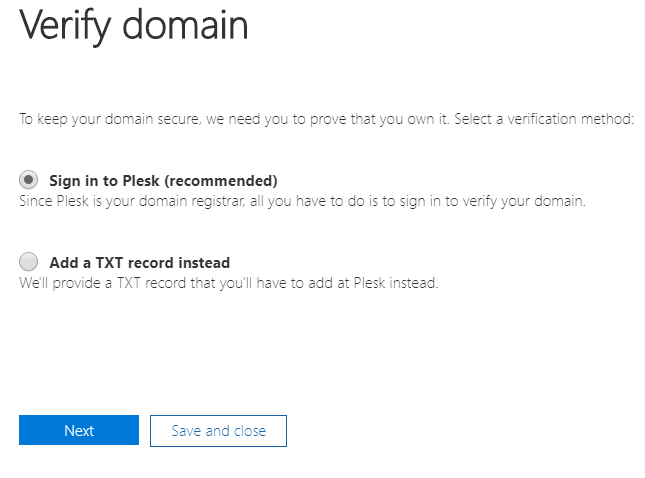
Office 365 needs to verify your domain. Keep the recommended verification method, and then click Next.
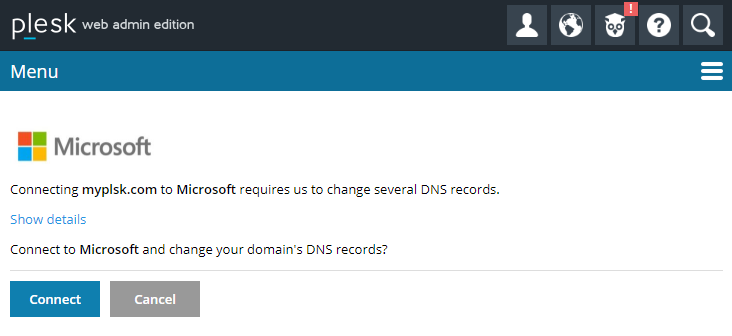
Log in to Plesk and then click Connect.
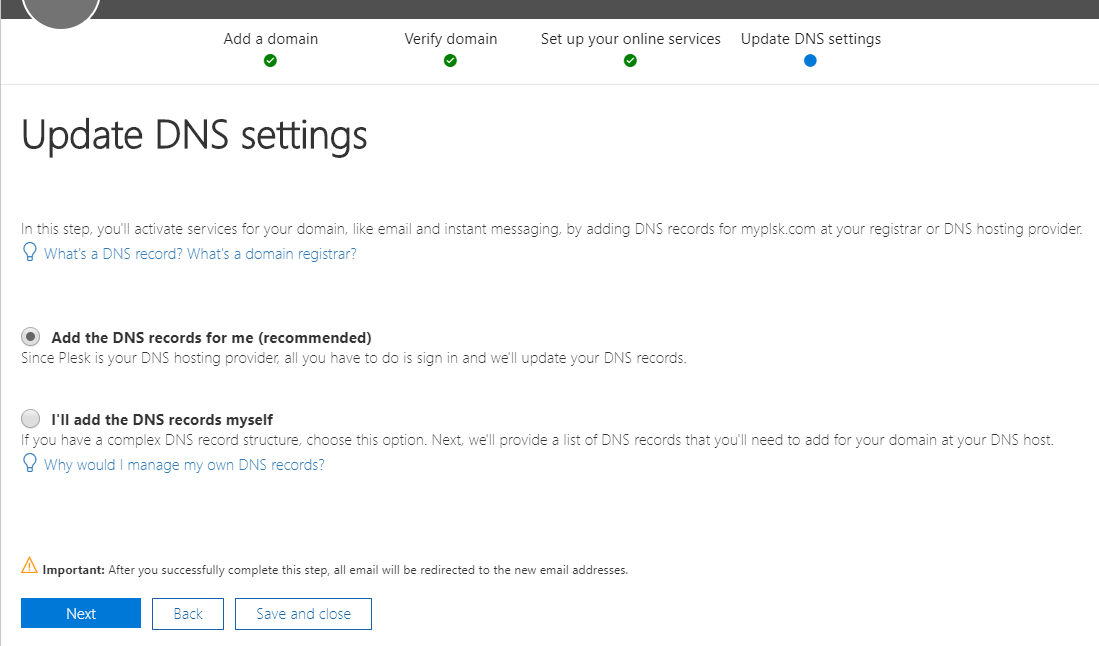
Office 365 will change the DNS configuration in Plesk to add additional services. Keep the “Add the DNS records for me (recommended)” option, and then click Next.
If desired, click “Show details” to see how Office 365 will change DNS configuration in Plesk. Click Connect to proceed.
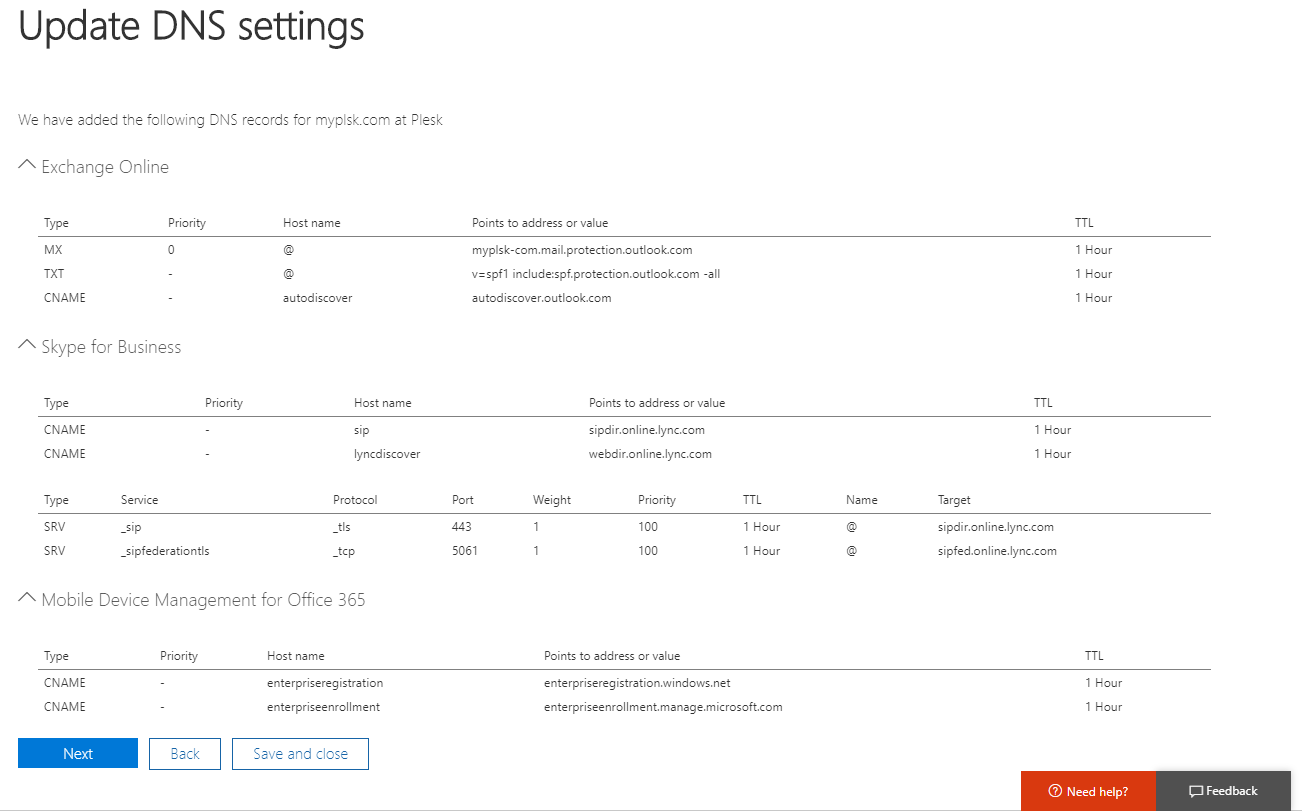
Office 365 will show you which DNS records were added to Plesk. Click Next to proceed.
Click Finish.
You have connected Office 365 services to your website.