Creating Custom Buttons
For easy access to Internet resources from the Plesk interface, you can create custom buttons that will be displayed in Websites & Domains. You can use this functionality, for example, to provide a link to your company’s website, to a helpdesk, or to a custom web application. Clicking a custom button takes the user to the preconfigured address. Additional information, such as the user’s contact name, subscription ID, or FTP username and password, can be passed along as well. The custom buttons can be reserved for your personal use, or shared with all other users created under your subscriptions.
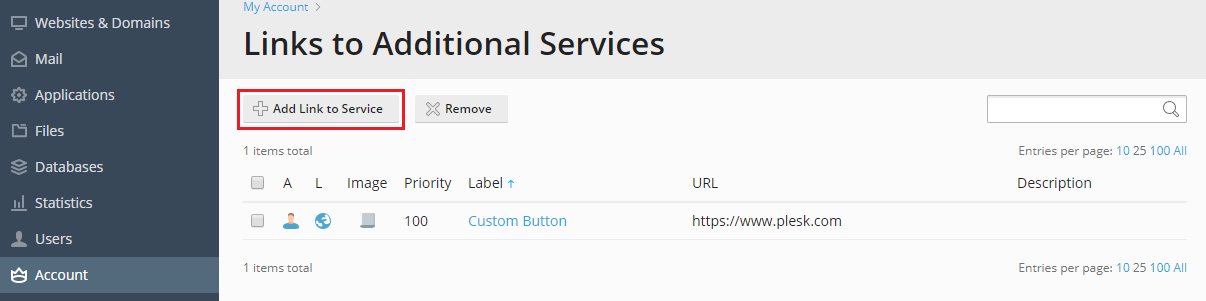
To add a custom button, go to Account and click Additional Services > Add Link to Service.
Configure your custom button with the following parameters:
Location. This setting determines the placement of the custom button. Choose from the four available options:
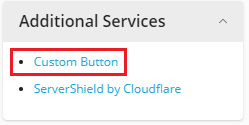
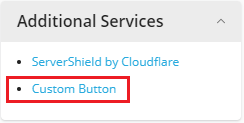
Common Access. The custom button will be available in Websites & Domains, in the Additional Services section of the navigation pane on the right:
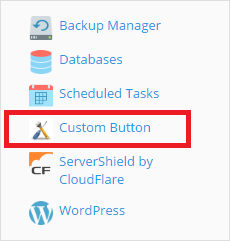
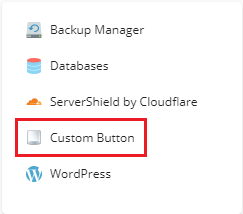
It will also be available in the section containing links to other Plesk functions, such as database management and backups:
Website Tools. The custom button will be available in Websites & Domains, among the other website controls, such as PHP settings and DNS settings:
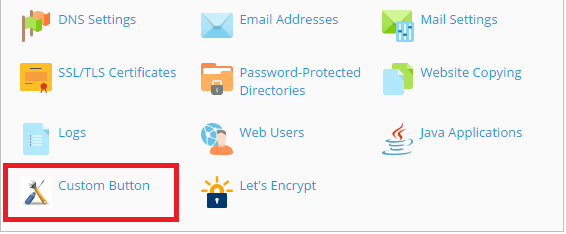
The custom button will be available for every domain and subdomain on every subscription you own.
Websites & Domains page of Subscription. The custom button will only be available in Websites & Domains, in the section of the navigation pane containing links to other Plesk functionality, such as databases and backups:
Customer’s Home page. The custom button will only be available in Websites & Domains, in the Additional Services section of the navigation pane:
Priority. This number helps define the order in which custom buttons are displayed. The lower the priority value, the closer the button to the top of the list (the buttons are ordered left-to-right in the website tools area, top-to-bottom otherwise). The custom button with the lowest priority value is displayed first, and the one with the highest is displayed last. If you only have a single custom button, this setting has no effect. Custom buttons with identical priority values are ordered alphabetically.
Background image. Square images work best. We recommend using a 16x16 pixels GIF or JPEG image for buttons placed in the navigation pane, and a 32x32 pixels GIF or JPEG image for buttons placed in the website tools area.
URL. Type in the target URL, starting with
http://orhttps://. Select one or more checkboxes below to have Plesk include certain information about the user or the currently selected subscription in the URL.
Open URL in Plesk. Select this checkbox if you want the target URL to open in the currently active browser window. Leave the checkbox cleared if you want the target URL to open in a new browser window.
- Do not use frames. Select this checkbox if you want the target URL to open and replace the Plesk interface. Leave the checkbox cleared if you want the target URL to open within the Plesk interface.
- Show to me only. Select this checkbox if you want the custom button to be shown to you only. Leave the checkbox cleared if you want the custom button to be shown to you and all other users created under your subscriptions.
To change the properties of a custom button, go to Account and click Additional Services, then click the name of the button you want to modify. To remove one or more custom buttons, select the corresponding checkboxes and click Remove.